Blog top | Forums top | DreamLover Labs Main site | DL Lounge
Register | Login


Shop for male chastity devices and other training tools through this link to support us.


New stuff:

2024-06-06
I love the idea of making cert...
by jcoldstream
2024-03-28
Email confirmations after comp...
by switch95forfun
2024-03-28
Email confirmations after comp...
by switch95forfun
2023-12-01
Emails not received
by DreamLover Labs
2023-08-17
My husband needs to have a DL ...
by jcoldstream
2023-08-17
Can you shower or get the DL20...
by chastitydomme
2023-08-17
Where can I find other people ...
by ahsdfjklhfw
2023-08-17
I would also like to hear from...
by jcoldstream
2023-04-14
If you have soldering skills y...
by honeypod
2023-04-14
I love it...
by sissymaidemily
2023-02-20
I also have been able to get m...
by bdsamm
2022-11-05
Closed or opened Indication fo...
by switch95forfun
2022-11-04
I get mine at a Batteriesplus ...
by Fuseldar
2022-10-05
Battery suppliers
by DreamLover Labs
2022-07-25
System appears to be stable
by DreamLover Labs
2022-07-23
I've been experiencing this is...
by mayasblade
2022-07-23
Diagnosing network issues
by DreamLover Labs
2022-07-23
I'm facing the same problem...
by P4Palkkz
2022-07-20
Please email support with all ...
by dreamloverlabs
2022-06-26
Connection issues? Download the updated Windows app
by DreamLover Labs
2022-06-24
Server down...
by Alex2012
2022-06-24
Please download the updated Wi...
by dreamloverlabs
2022-06-24
Please download the updated Wi...
by dreamloverlabs
2022-06-24
I have tried several times to ...
by nikki.smith
2022-06-24
Login Response Unsuccessful...
by SlaveofDesire86
2021-11-05
Mistress Keyholder Rules the W...
by mistresskeyholder
2021-10-22
Widget not working...
by slavejake
2021-09-03
Giving back the Temp Ownership...
by keyholder0734
2021-08-24
What do you say guys shall we ...
by dreamloverlabs
2021-08-24
Hybrid solar systems...
by unipu2009
2020-12-10
Battery passivation
by DreamLover Labs
2019-09-02
Footage of DL2000 in use
by DreamLover Labs
2019-03-31
Hi, I am looking for a keyhold...
by dreamlover12
2019-01-20
Product questions
by DreamLover Labs
2018-07-29
Pay using cryptocurrencies
by DreamLover Labs
2018-07-08
Behind Barz + DreamLover 2000
by DreamLover Labs
<< return to blog entries

Polycarbonate prototypes and spray painting results!!!

2010-06-04 11:00:24 (9745 views)

Full day at the plastic factory!! Very nice stuff...
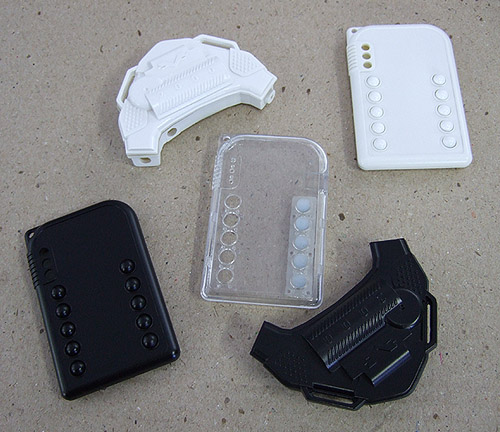


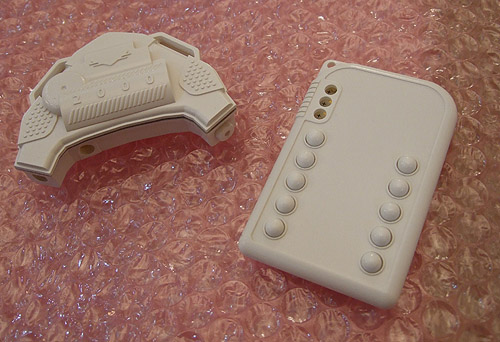
Polycarbonate prototypes... very nice finish for a machined part, although the new machine shop screwed up a few spots and we can't put the PCB in the receiver (but they are making a new piece free of charge to fix this).
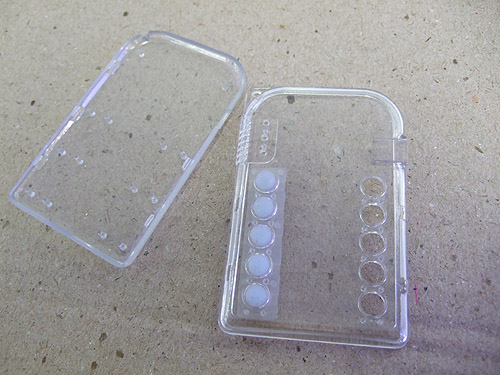
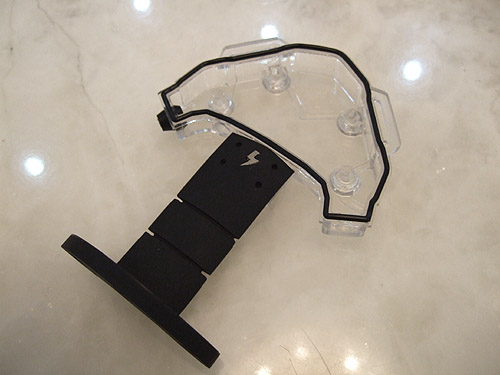
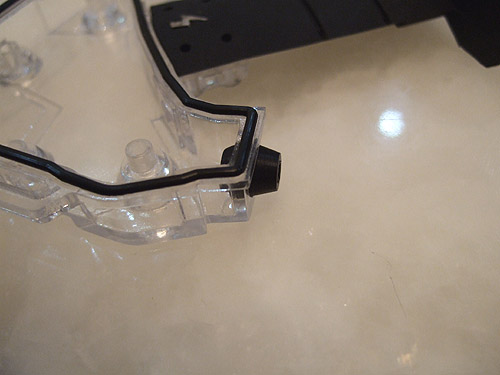
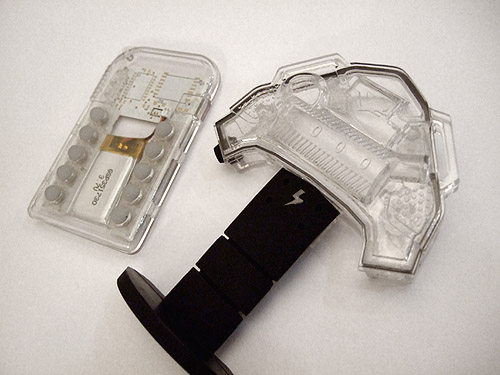


Now some spray painting... please note that these are machined prototypes; the molded parts will be even smoother and nicer. Still, these parts are Juicy! Very, very professional.
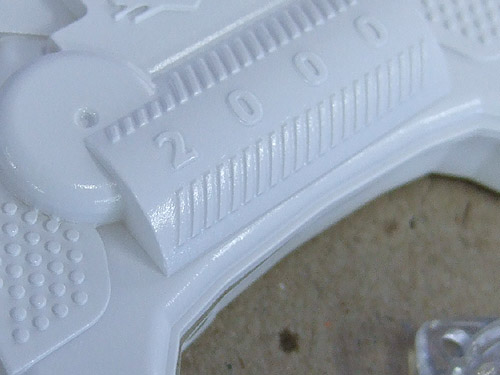
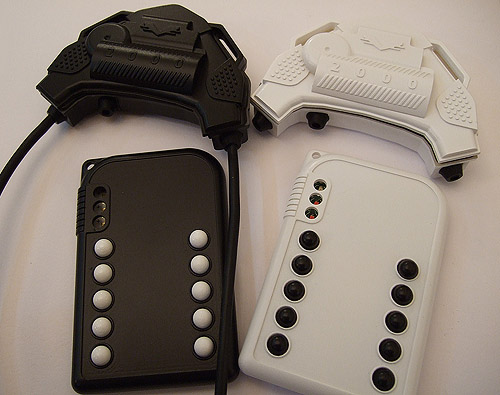
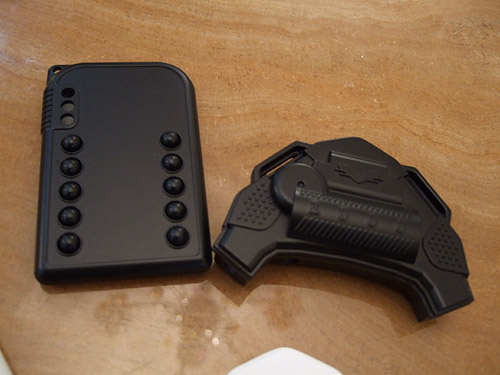
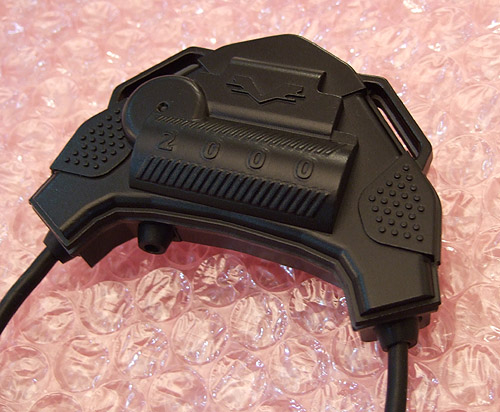


Ok... the "inside painting" trick didn't work very well - but the reason is very that these parts are machined, not molded. For Polycarbonate it makes a huge differences. Molded parts are extremely smooth, like glass, but machined parts - though clear - are not as smooth, they look more like candy than glass, and the sharp angles are opaque, and so the overall effect is not very good because (a) the surface isn't shiny enough and (b) the inner angles look "dirty". We won't see the real look of this until the mold's done...
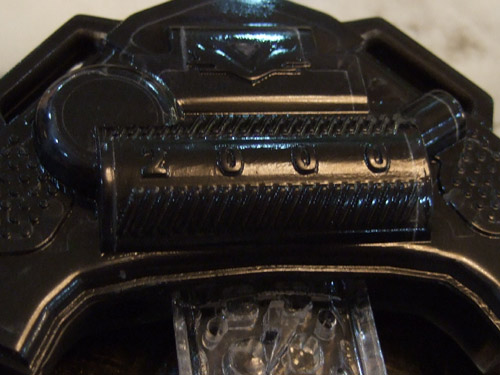


Despite this the remote came out looking respectable enough:
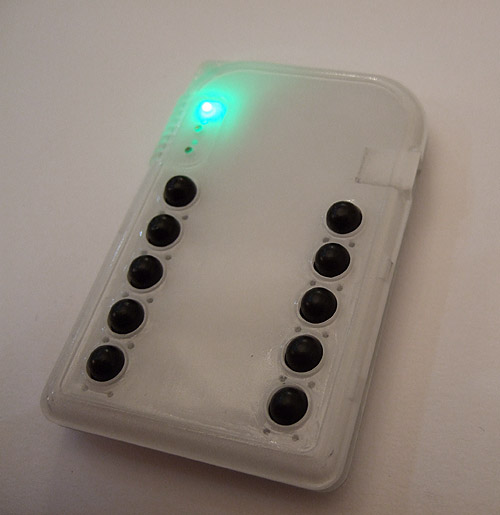


By the way, the USB connector fits in just right in the new enclosure.
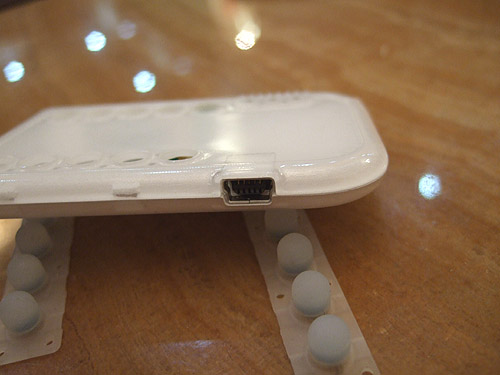


A medium res shot here (click):


A high res shot here (click):
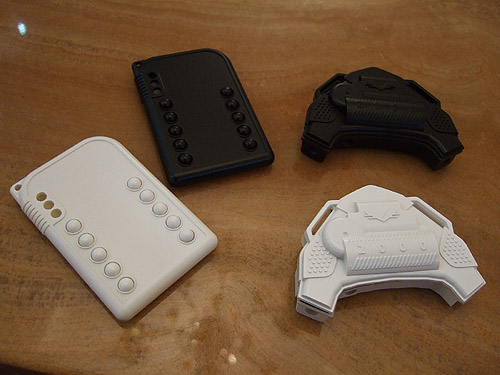


More notes and comments:

- the keypads are spray painted with a kind of spray paint that doesn't stick well to rubber. In the final version the rubber itself will be colored. But we like the shiny look, so we'll see what the rubber version looks like and possibly decide to spray paint them with the right paint (if a kind even exists that will both stick and produce this shiny look).

- Since we only had one prototype of the polycarbonate enclosures with the updated design, we sprayed our old prototypes. So the black and white remotes painted on the outside do not have the latest features (light pipe, USB connector hole). Similarly the receiver doesn't have the attachment boss at the bottom.

- Today we've also received the components needed to assemble the battery recharging remote control (now waiting only for the PCBs)

- Jason showed us some parts which we weren't able to find on the net on western sites: truly small brass inserts, perhaps only 2-2.5mm in diameter. If we can embed them into the top half of the receiver's enclosure, the screws will not need to touch the plastic directly, so the number of times you can open and close the receiver will be pretty much unlimited (as opposed to 10 or so). However this requires plastic modifications, OVERMOLDING (don't worry - Jason does it perfectly unlike you-know-who at the rubber factory), and CUSTOM SCREWS. So - unless we get seriously lucky this won't be in the first release for both timing and cost considerations. Now this impacts the mold, so we don't know for sure yet, but we have some chances of being able to offer just an alternative top half + screws at a later time (the bottom does not need to be changed). As you know we need to launch so we won't let this slow us down... but at least we'll find out exactly where we stand before going into production with the mold, and have an idea about whether we can do it right away, add them later, or nada.

More pictures may be found here until we have time to create some gallery code.

The plan:

- get PCBs, get new lower half of the receiver so we can fit the PCB in

- in the meanwhile we must finish the waterproofing tests with one spare non-painted transparent receiver enclosure top half (transparent parts allow us to test without having to open the enclosure every time to check for water). The unit is already 99.9% waterproof but we have some counter-intuitive watery behavior (capillary stuff) going on that requires insulation, heat shrink material, heat... and repeating the process many times to be sure it's something that can be done reliably in a production environment.

- assemble the very very final DL2000 prototype, make sure no problems exist *anywhere*, this will be the most comprehensive test batch ever and we need to finish all wireless reprogramming and USB reprogramming work by then, and make sure all the commented out code (timer mode, etc) has been reintroduced and works fine

- push the red button: go ahead with the plastic injection mold and do final EMC testing at the lab (need to brainstorm a bit about the correct sequence...). After these steps we will NOT be able to make any modifications whatsoever to the electronics or enclosures.

Comments

By johnsteed at 2010-06-04 13:27:50 Reply
I have to say the inside-spray units don't look all that great. Perhaps it's due to the machined parts vs. molded, but without seeing samples of inside-painted molded parts, that's hard to say.


The outside-painted units definitely looked better -- but I would not want them. Outside paint will be subject to wear and tear and scratching.


So I have to say that I vote for colored plastic (though don't know how you'll do the LED shine-through).


I think the DL2000 itself would look very cool in clear plastic, so maybe that solves the problem. But the remote unit would look better in black, though I know people at DLLabs seem to prefer white. I think most of the posts on that topic preferred black remotes too.
By dreamloverlabs at 2010-06-04 22:35:18 Reply
Do not assume that if a piece of plastic is not spray painted its surface will always look new. Plastic is a soft material (hence its moldability and usefulness). As such it accumulates scratches extremely easily compared to metal; these are especially noticeable if the part has a shiny/mirror finish. Just look at your CBx000 for instance.


About the paint, it actually may offer more scratch resistance than plain polycarbonate based on tests performed yesterday and today. Tried scratching it with fingernails, scratching lightly against marble, and even with a piece of sharp metal. Only the metal produced any visible mark - and even then the paint is hard/thick enough that you have to scratch in the same spot multiple times and very hard before you can dig down to the underlying material.


The same treatment on a CB3000 produced many visible marks (just using this product as an example of a well known plain polycarbonate part with curved features and similar thickness).


We're actually very impressed - didn't expect spray painting would look this good or be this resistant.


One interesting thing about spray painting that we discovered yesterday is that even parts that are molded in the final color, say black or white, are usually spray painted in the same color to hide mold marks and plastic inflow artifacts. In regions with holes, with molding you have "weld marks". All molded objects have these near holes, it's a basic drawback of the molding process. Especially evident with dark colors and glittery plastics. If you took a look at the bare plastic parts from your tv or laptop you'd be surprised to see they don't look "perfect" at all but instead show the flow of plastic through the part ("molten icecream effect").


Light colored plastic is translucent, so these marks are less evident, but to make up for that, this "subsurface scattering" (in CGI speak) makes it look cheaper than something slightly textured and spray painted. The main cosmetic improvement in our recent photos comes not from the color but the fact that the complex surface is now reflecting light instead of scattering it below its surface; so all the edges look sharper. This is why even white parts are usually spray painted white.


Leaving the receiver transparent, if people generally agree it looks cool, will have the main advantage that it will allow one to check that water isn't going in, which is good for first time users who aren't familiar with how to properly set up the rubber parts and how tight to close the screws etc. If our final choice is to make PC parts and spray paint them, extra non-painted parts can be had without any further effort which is good.


A first trial (non-transparent bottom, transparent top) shows the receiver's enclosure lights up along most contour lines when the LED is activated, which is very cool to look at in the dark (pictures coming up).


However when it's not dark this looks like some trade fair display sample showing the internals... it's not so rugged looking - oh well it's a matter of taste really. On one side we want it to look "professional" by looking like all other electronics on the market. On the other hand people have looked at those ad nauseam and may very well welcome something that looks unusual.


Another parameter here is texturing. Texturing is applied to the mold, and it makes the plastic part look more rugged, and scratches aren't as easy to notice. Texturing is cool (check http://www.dreamloverlabs.com/galleries/spray/DSCF3305.JPG). This again is a hassle, draft lines, parting lines, everything affects its feasibility etc. - but we're told the remote can pretty much be textured.


--


A final thought which perhaps is the most important is that unlike your laptop or cell phone, you will be able to buy replacement shells for your DL2000 to always keep it shiny and looking brand new. In fact, when we've got some cashflow we will definitely experiment with other colors so it will be pretty cool to get a new top half so it can always match your lady's dress. :)
By Lance_Lake at 2010-06-05 17:51:52 Reply
To me, showing the electronics fulfills my geek level. Even if it's not pretty, it's neat to think of being able to see "your tormentor" and perhaps think, "If I could only disable that resister, it would stop shocking me" kind of thing.


Even if it's messy, it will still look cool IMHO.
By johnsteed at 2010-06-05 10:59:05 Reply
Interesting slightly-related comment: recently showed someone the PetSafe Small Dog trainer I have. The remote has a very nice "soft-touch" feel to it rather than the typical hard plastic feel. I don't know if it's molded out of some hard rubber rather than plastic (unlikely) or if it's spray-painted with a rubbery-feeling paint. But it received high marks for ergonomics and the nice feel (the big rubber buttons have a similar feel, but are soft rubber).
By dreamloverlabs at 2010-06-05 11:02:05 Reply
You're probably talking about a special kind of paint that has a rubbery feeling to it. You can verify by opening and touching the inside of the enclosure.
By FJJHouston at 2010-06-06 12:44:01 Reply
Keep up the good work. We can't wait.


When are you going to update the pictures on your web site to show the most recent versions of the product?
Post new comment
(C) 2008-2016 DreamLover Laboratories - all rights reserved